
Table of Contents
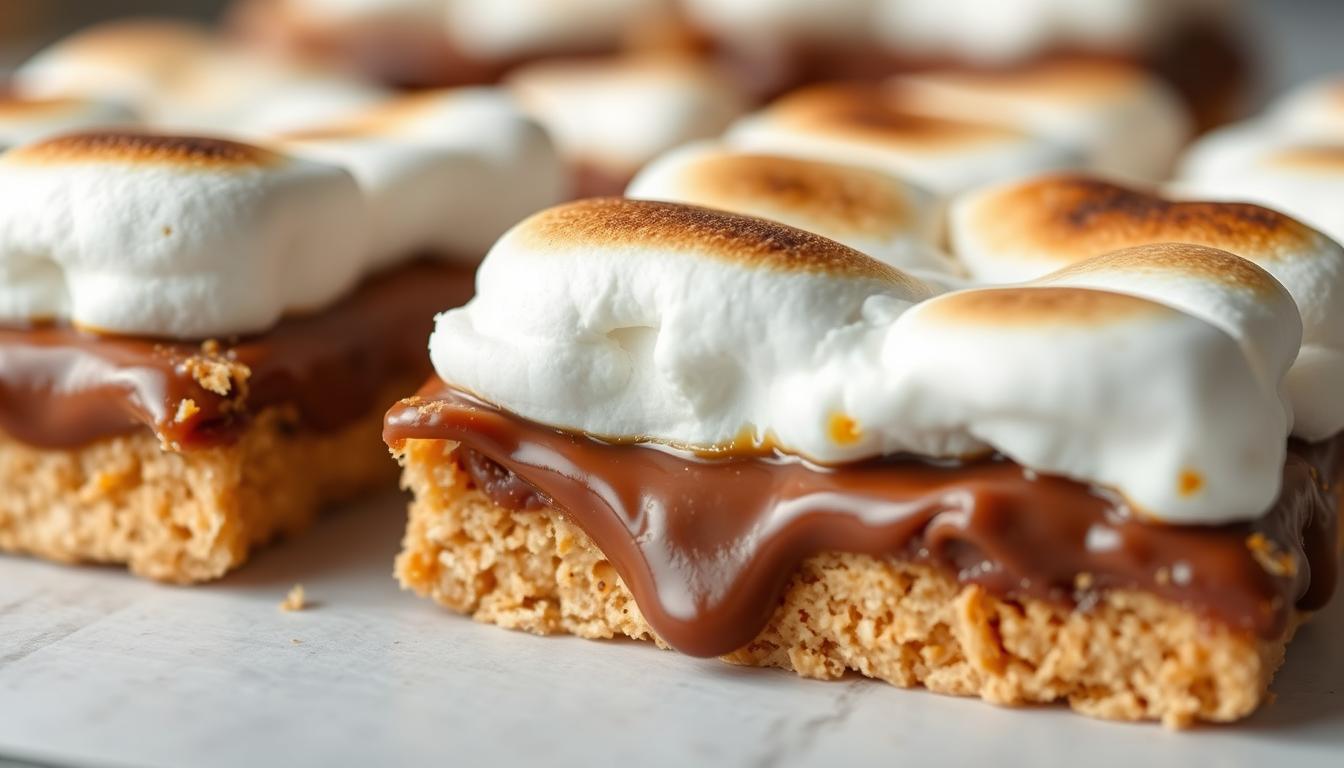
Summer memories come alive with every bite of warm, gooey s’mores bars. The magic of campfire treats doesn’t have to end when you step inside. Your homemade s’mores bars recipe can bring that nostalgic sweetness right to your kitchen, turning a classic outdoor dessert into an anytime indulgence.
Imagine making the ultimate s’mores bars that capture all the melty chocolate, crisp graham cracker, and soft marshmallow goodness without needing a campfire. This guide will show you how to make the most irresistible homemade s’mores bars. They’ll have everyone asking for seconds.
Key Takeaways
- Learn to make restaurant-quality s’mores bars at home
- Discover the secret to achieving perfect gooey texture
- Create a versatile dessert that works for any occasion
- Master a recipe that brings outdoor camping flavors indoors
- Explore easy techniques for foolproof s’mores bars
Why S’mores Bars Are the Perfect Treat
S’mores bars open up a world of tasty treats beyond campfire snacks. They bring the classic s’mores taste to your kitchen. This makes enjoying a favorite American dessert easy and fun.
History of Traditional S’mores
The s’mores story began in the early 1900s. Girl Scouts first wrote about them in their camping guides. They were called “Some Mores” because everyone wanted more. Soon, they became a summer favorite with graham crackers, chocolate, and marshmallows.
Benefits of Making S’mores Bars
- Eliminate messy campfire preparation
- Consistent texture and even chocolate melting
- Perfect for large gatherings
- No special outdoor equipment required
Year-Round Indoor S’mores Alternative
Indoor s’mores bars bring the campfire treat to your kitchen. Enjoy the chocolatey, gooey taste all year. No matter the weather or where you are.
| Traditional S’mores | S’mores Bars |
|---|---|
| Requires campfire | Baked in oven |
| Seasonal | Year-round |
| Unpredictable results | Consistent texture |
| Limited serving | Easy to share |
Craving a nostalgic treat or a simple dessert? S’mores bars are perfect for chocolate and marshmallow fans.
Essential Ingredients for Amazing S’mores Bars
Making delicious bars begins with the right ingredients. The ingredients you choose will affect the taste and texture of your dessert. Let’s look at the key parts that make these treats so good.
The base of any s’mores bars recipe is high-quality graham crackers. These crackers give a rich, buttery taste that captures the campfire s’mores feel. It’s important to pick a brand with a strong, real graham flavor.
- Graham crackers (essential base ingredient)
- Premium chocolate (milk or dark)
- Large marshmallows
- Unsalted butter
- Vanilla extract
When picking chocolate, choose high-quality chocolate that melts well. Chocolate quality is key to your dessert’s success. Mixing milk and dark chocolate adds depth to the flavor.
| Ingredient | Recommended Quantity | Quality Tip |
|---|---|---|
| Graham Crackers | 2 cups crushed | Choose full-flavor, fresh crackers |
| Chocolate | 1 cup chopped | Use premium chocolate bars |
| Marshmallows | 2 cups | Fresh, soft marshmallows work best |
Marshmallows are the highlight of bars. Fresh, plump marshmallows create that gooey texture we love. A tip: lightly toast the marshmallows for a campfire-like flavor.
Kitchen Tools and Equipment Needed
To make delicious bars, you need the right tools and equipment. The right kitchen gear makes baking fun and helps you make treats everyone loves.
Before you start, get the essential tools. The right equipment makes the process easier and helps you get that gooey texture everyone wants.
Baking Pan Selection
Choosing the right baking pan is key for bars. Here are some options:
- 9×13 inch rectangular glass baking dish
- Metal baking pan with straight edges
- Non-stick ceramic baking dish
- Aluminum baking sheet with raised edges
Essential Mixing Tools
Make sure you have these mixing essentials:
- Large mixing bowl
- Silicone spatula
- Whisk
- Measuring cups and spoons
- Parchment paper
Temperature Control Gear
Accurate temperature control is vital for perfect bars. Get:
- Digital oven thermometer
- Kitchen timer
- Oven mitts
- Cooling rack
With the right tools, you’re set for baking success. You’ll make treats that impress family and friends.
How to Prepare Your Baking Space
Creating the perfect environment for s’mores bars is key to success. A well-organized space is essential for delicious treats and smooth cooking. Start by clearing your kitchen counter completely. This gives you room to work and spread out ingredients.
Before starting your s’mores bars, follow these steps:
- Clean and sanitize your workspace thoroughly
- Gather all necessary ingredients and tools in advance
- Preheat your oven to the recommended temperature
- Arrange ingredients in order of use
Your baking area should be comfortable and inviting. Smart organization reduces stress and makes baking more enjoyable. Keep your mixing bowls, measuring cups, and baking pan within reach. Make sure you have good lighting and a clean kitchen towel for quick cleanups.
Temperature control is important in baking. Keep your ingredients at room temperature unless the recipe says differently. This ensures even mixing and texture in your s’mores bars.
- Use a digital kitchen scale for precise measurements
- Have parchment paper ready for easy removal
- Keep a timer accessible
By preparing your baking space, you’ll be set for s’mores bars success. You’ll also have a stress-free and enjoyable baking experience.
Step-by-Step S’mores Bars Recipe
Making s’mores bars is simpler than you think. These treats bring the campfire classic to your kitchen. Follow easy steps to impress everyone with a dessert that’s all about s’mores.
First, get all your ingredients and tools ready. The secret to great bars is in the prep and technique. We’ll guide you through each step to make a dessert that’s sure to delight.
Graham Cracker Crust Foundation
Begin with a solid base for your bars. You’ll need:
- 1½ cups graham cracker crumbs
- ⅓ cup melted butter
- ¼ cup granulated sugar
Mix the ingredients until they’re just right. Press the mix into a 9×13 inch baking pan lined with parchment. Pro tip: Use the back of a measuring cup to get an even layer.
Chocolate Layer Perfection
The chocolate layer is key for real bars. Spread high-quality milk chocolate chips or chocolate bars over the graham cracker base. Make sure to cover it all for the best taste.
Marshmallow Topping Technique
For the last layer, use marshmallow fluff or large marshmallows. If using whole marshmallows, cut them in half for easier spreading. Arrange them to get a golden-brown top.
Bake at 350°F for 15-20 minutes until the marshmallows are golden. Let the bars cool completely before cutting into squares for the ultimate gooey treat.
Tips for Achieving the Perfect Gooey Texture
Making the perfect gooey s’mores bars needs skill and a few tricks. The key to a great bars texture is knowing how ingredients work together when baked.
To get those gooey s’mores bars just right, follow these important tips:
- Use room temperature ingredients for consistent mixing
- Measure ingredients precisely to maintain ideal moisture
- Avoid overmixing the batter to prevent tough bars
Temperature is key for the right texture. Bake your bars at a moderate 350°F. This ensures even heating and keeps the mixture moist.
| Texture Challenge | Solution |
|---|---|
| Dry Bars | Reduce baking time by 2-3 minutes |
| Undercooked Center | Use an instant-read thermometer (around 190°F) |
| Marshmallow Consistency | Broil for 1-2 minutes for golden finish |
For the ultimate gooey bars texture, let your bars cool completely before cutting. This lets the ingredients set, giving you that soft, chewy texture everyone adores.
Storage and Serving Recommendations
Enjoying homemade s’mores bars needs smart storage and serving tips. Whether you’ve just baked or want to keep leftovers, the right methods keep your treats tasty and fresh.
Proper S’mores Bars Storage Methods
Storing bars right keeps their amazing taste and texture. Follow these tips for the best storage:
- Store at room temperature in an airtight container
- Place parchment paper between layers to prevent sticking
- Keep away from direct sunlight and heat sources
- Consume within 3-4 days for best quality
Reheating Your Delicious Treats
Want warm, gooey bars? Reheating is easy with these methods:
- Oven method: Preheat to 250°F, warm for 5-7 minutes
- Microwave method: Heat for 10-15 seconds on low power
- Let cool for 1-2 minutes before serving
Serving Temperature Guidelines
Serving s’mores bars at the right temperature makes them even better. Room temperature or slightly warmed is best. Pro tip: Let bars sit for 10 minutes after reheating for the perfect gooey texture.
Don’t forget about presentation! Serve your s’mores bars on a decorative plate. Add a small scoop of vanilla ice cream or a sprinkle of graham cracker crumbs for extra deliciousness.
Creative Variations and Mix-ins
Make your bars stand out with exciting variations. These treats are versatile, letting you try different mix-ins and flavors.
Start with chocolate mix-ins. Each type of chocolate adds a special taste to your bars:
- Dark chocolate for intense, rich flavor
- Milk chocolate for classic sweetness
- White chocolate for a creamy twist
Add creative mix-ins for texture and flavor. Try:
- Chopped nuts like pecans or almonds
- Crushed peppermint candies
- Dried fruit such as cranberries
- Caramel swirls
- Peanut butter drizzle
For a bold twist, add cookie dough chunks or pretzel pieces. These ingredients make your bars unique and exciting.
But don’t overdo it with mix-ins. Too many can hide the s’mores taste. Aim to add to the flavor, not cover it up.
Common Troubleshooting Tips
Making bars can sometimes be tricky, but with the right knowledge, you can overcome common challenges. S’mores bars troubleshooting is an essential skill for bakers who want to create the perfect dessert every time.
Don’t worry if your first attempt doesn’t turn out perfectly. Fixing s’mores bars is easier than you might think. Let’s explore some common issues and their solutions.
Texture Challenges and Remedies
Texture problems can make or break your bars. Here are some quick fixes:
- Crumbly Crust: Add an extra tablespoon of melted butter to help bind graham cracker crumbs
- Too Soft Bars: Increase baking time by 2-3 minutes and cool completely before cutting
- Hard Edges: Cover pan edges with aluminum foil to prevent over-browning
Baking Temperature Strategies
Oven variations can impact your bars significantly. Consider these temperature adjustment tips:
- Use an oven thermometer to verify actual temperature
- Reduce temperature by 25 degrees for dark or glass baking pans
- Rotate pan midway through baking for even cooking
Smart Ingredient Substitutions
Dietary restrictions shouldn’t stop you from enjoying delicious bars. Try these smart swaps:
- Gluten-free graham crackers for traditional crusts
- Dairy-free chocolate chips for standard chocolate layers
- Vegan marshmallows for traditional marshmallow topping
With these bars troubleshooting techniques, you’ll be creating perfect treats in no time!
Dietary Modifications and Alternatives

Making tasty bars for different diets is simpler than you might think. You can find gluten-free bars or vegan bars. There are many tasty options for various dietary needs.
To make gluten-free bars, swap out some ingredients. Start by using gluten-free graham crackers instead of the regular kind. You can also try:
- Gluten-free graham-style crackers
- Almond flour-based crusts
- Coconut flour cookie bases
Vegan bars need some creative ingredient swaps too. Look for plant-based alternatives for the usual ingredients. Here are some ideas:
- Vegan marshmallows (made from plant-based gelatin alternatives)
- Dark chocolate varieties without milk solids
- Coconut-based graham cracker substitutes
Want to cut down on sugar? You can make low-sugar or keto-friendly bars. Try these:
- Monk fruit sweetener
- Stevia-based chocolate
- Almond flour crusts with zero-carb sweeteners
The secret to great gluten-free and vegan bars is keeping the flavor right. With a little creativity, you can enjoy this favorite treat no matter your diet.
Conclusion
Making homemade bars opens up a world of sweet treats. You’ve learned to turn the classic campfire snack into a year-round dessert. This recipe is flexible, so you can make it your own.
You now know how to pick the right graham cracker base and create gooey chocolate and marshmallow layers. This skill lets you impress everyone with your dessert. You can try new things like adding nuts or using different chocolates.
Your s’mores bar journey is just starting. Every batch is a chance to get creative and make it your own. Get your baking tools ready and start making your own bars. We can’t wait to see what you come up with!
Sharing recipes with loved ones is the best part. Take a photo of your bars and share them with friends. Your baking journey is just beginning!